A frequent case when you want to connect two sites with IPsec VPN is that these two sites are on the same addressing plan.
In this case, a good solution is to use NAT.
For example, if we want to connect two sites using the 192.168.1.0/24 subnet on their internal network (LAN), they will not be able to communicate with each other through the VPN because the subnet is the same on the local network and on the remote network.
In order to solve this problem, we propose to use NAT to communicate from one network to the other.
This is the principle of a VPN with an overlapping subnet.
Note: we do not detail in this article how to configure a site-to-site IPsec VPN. There is already a dedicated article on the subject: [pfSense] Configuring a site-to-site IPsec VPN.
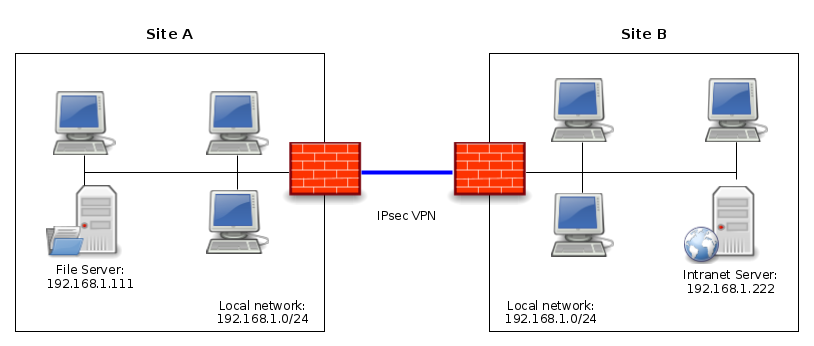
Network diagram
We take the example of two sites (A and B) both having the same subnet on their LAN: 192.168.1.0/24
In order to connect these two sites with the IPsec VPN, we have two possibilities:
- NAT the entire subnet of site A so that it can be reached from site B through the IPsec VPN. And conversely, we will do the same for the subnet of site B so that it can be reached from site A through the IPsec VPN.
- NAT all traffic to a single IP address. This is the principle used when surfing the Internet: all private IP addresses of the LAN are NAT to the public IP address of the Internet connection.
The choice of NAT type depends on the context and objectives.
If you want to access several devices, the best solution is to use a one-to-one NAT (1:1 NAT) – i.e. the first solution mentioned above.
Otherwise, a simple NAT on a single IP address will be enough.
In our example we will set the following configuration:
- From site A: the LAN of site B will be reachable with the following subnet: 192.168.200.0/24; thus, from site A, to reach the server 192.168.1.222 (present on site B), we will request the IP address 192.168.200.222.
- From site B: the LAN of site A will be reachable with the following subnet: 192.168.100.0/24; thus, from site B, to reach the server 192.168.1.111 (present on site A), we will request the IP address 192.168.100.111.
Configuring NAT and IPsec
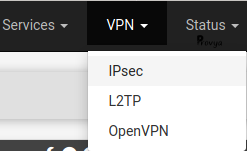
On the pfSense of the site A, go to VPN > IPsec:
We do not detail the configuration of phase 1; this part is covered in our dedicated article [pfSense] Configuring a site-to-site IPsec VPN.
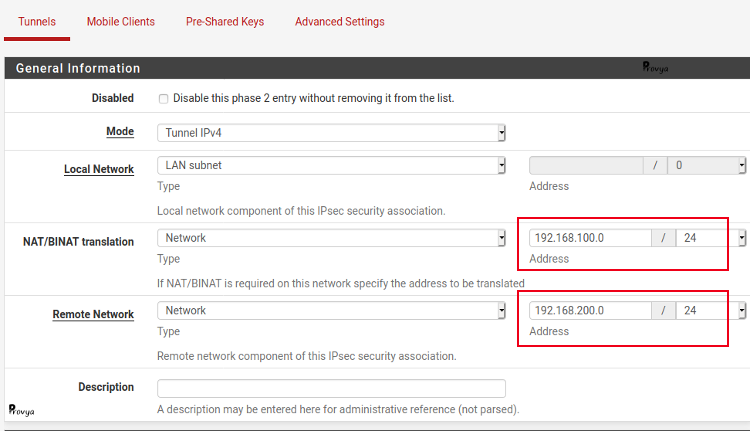
Concerning phase 2, the specific elements to configure are the following:
- Mode: choose Tunnel IPv4. Be careful, NAT is not possible with a Routed (VTI) IPsec VPN.
- Local Network: choose “LAN subnet”, or more generally the real local subnet you want to make accessible through the IPsec VPN (192.168.1.0/24, in our case).
- NAT/BINAT translation: choose “Network” and indicate “192.168.100.0/24” for the address and mask fields.
- Remote Network: choose “Network” and indicate “192.168.200.0/24“.
The other parameters of phase 2, are not specific to setting up VPN with NAT, so we do not detail them here.
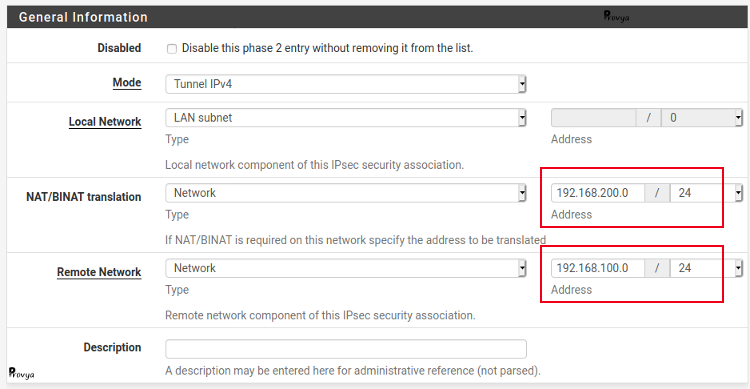
On the pfSense of the site B, we perform the same configuration, but remember to reverse the values.
Configuring filter rules
We still have to adapt our filtering rules to the translated addressing plan.
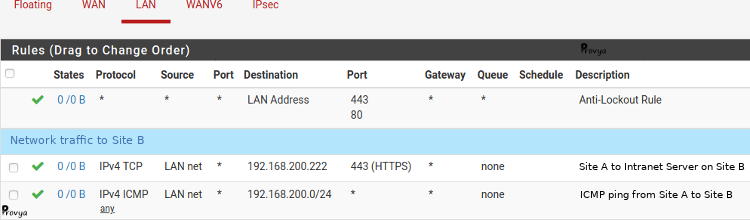
Thus, on our LAN interface, to filter the traffic from the local network of site A to site B, in the source field we set the LAN subnet (192.168.1.0/24) and in the destination field the translated subnet for site B (192.168.200.0/24).
Example of the result obtained for site A:
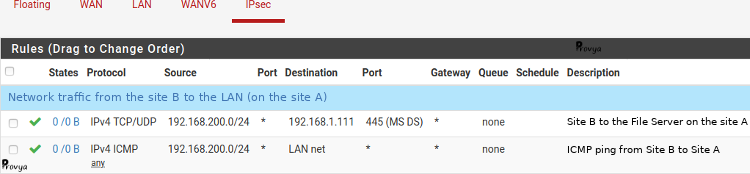
To filter the network traffic coming from the IPsec VPN (IPsec tab), the NAT operation having already taken place, the filtering must be done on the real IP addresses of the local site and on the translated IP addresses of the remote site.
Example of the result obtained for site A :
That’s it!
Related topics
[pfSense] Configuring a Site-to-Site IPsec VPN
[pfSense] Configuring a Site-to-Site OpenVPN Instance
[pfSense] Secure remote access for your home-office workers with OpenVPN
Take a look at our firewalls
French manufacturing & quality
3 year warranty
Free delivery to EU, UK, USA and Canada