We will see in this article how to build a site-to-site VPN between two pfSense with OpenVPN.
Using pfSense, connecting two sites using OpenVPN is very simple. One side is configured as a client, and the other side as a server.
The recommended method is the shared key mode.
How it works
One side is configured as a client, and the other side as a server.
A pfSense can be defined as a client or as a server. There is absolutely no difference from a network or functionality point of view.
However, if you want to connect several remote sites to a main site, the most logical thing to do is of course to define the main site as “server” and the remote sites as “clients”.
In our implementation example, we will use the following infrastructure:
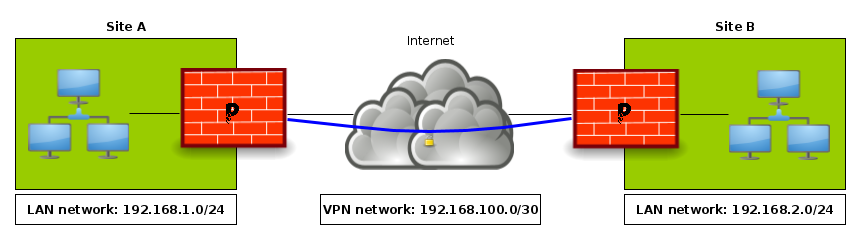
pfSense A will be configured as an OpenVPN server.
pfSense B will be configured as an OpenVPN client.
Site A – pfSense as an OpenVPN server
We have to follow these steps:
- configure the OpenVPN server
- configure the appropriate firewall rules
Let’s go!
1. Configuring the OpenVPN server
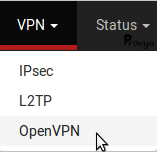
Go to VPN > OpenVPN:
In the “Servers” tab (the default tab), click on the “+ Add” button at the bottom right of the page.
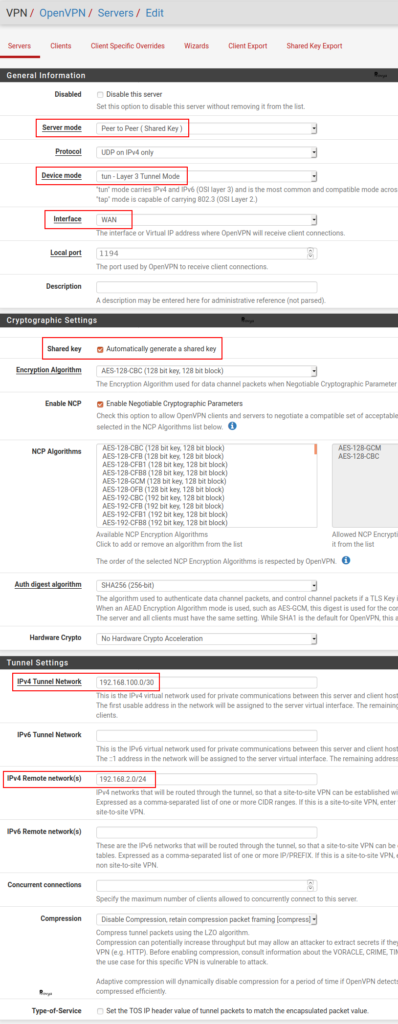
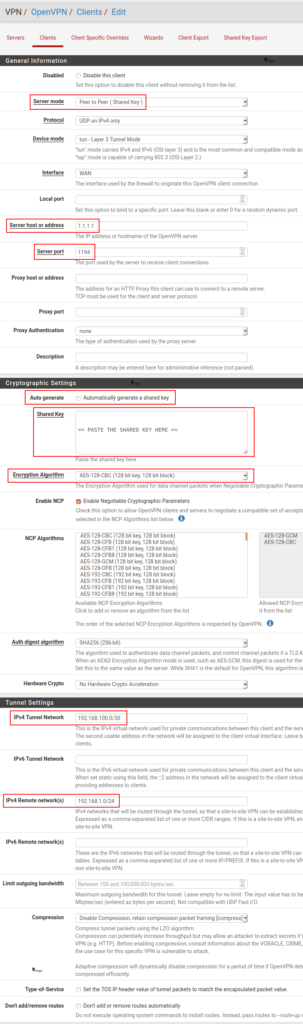
The fields to be filled in are the following:
- Server Mode: choose Peer to Peer (Shared Key).
- Device Mode: tun.
- Interface: WAN, normally. More generally the interface on which the OpenVPN server should be reachable.
- Local port: we keep the default value (1194).
- Shared key: keep the Automatically generate a shared key checked.
- Encryption Algorithm: keep the default or choose a stronger one.
- Enable NCP: check that case to enable the Negotiable Cryptographic Parameters.
- NCP Algorithms: choose at least AES-128-CBC and AES-128-GCM (or stronger) which are AES-NI compliants.
- IPv4 Tunnel Network: the VPN network. In our case 192.168.100.0/30
- IPv4 Remote network(s): the remote network(s). In our case 192.168.2.0/24
The other settings can keep their default configuration.
We click on the “Save” button. The OpenVPN server is created.
2. Configuring the firewall rules
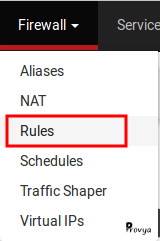
Go to Firewall > Rules:
Add a firewall rule on the WAN interface (or on the interface on which your OpenVPN is reachable) with the following settings:
- Protocol: UDP
- Source: any
- Destination: this firewall
- Destination port: 1194 (or the port you chose previously)

Then, add a firewall rule on the LAN interface with the following settings:
- Protocol: *
- Source: LAN net
- Destination: network – 192.168.2.0/24 (the local network of the site B)
- Destination port: any
This rule allows traffic from LAN to the network of the site B.

Finally, add a firewall rule on the OpenVPN interface with the following settings:
- Protocol: *
- Source: network – 192.168.2.0/24 (the local network of the site B)
- Destination: LAN net
- Destination port: any

This rule allows traffic from the network of the site B to the LAN.
Obviously, your firewall rules could be more restrictive or permissive.
Site B – pfSense as an OpenVPN client
We have to follow these steps:
- configure the OpenVPN client
- configure the appropriate firewall rules
1. Configuring the OpenVPN client
Go to VPN > OpenVPN:
The fields to be filled in are the following:
- Server Mode: choose Peer to Peer (Shared Key).
- Protocol: UDP
- Device Mode: tun.
- Interface: WAN, normally.
- Server host or address: The public IP address of the site A.
- Server port: The port configured on the server. In our case: 1194.
- Cryptographic Settings: uncheck the Automatically generate a shared key case and paste the shared key which has been generated previously on the server.
- Encryption Algorithm: keep the same value that you chose on the server side.
- Enable NCP: keep the same value that you chose on the server side.
- NCP Algorithms: keep the same values that you chose on the server side.
- IPv4 Tunnel Network: the VPN network. In our case 192.168.100.0/30
- IPv4 Remote network(s): the remote network(s). In our case 192.168.1.0/24
The other settings can keep their default configuration.
We click on the “Save” button. The OpenVPN client is created.
2. Configuring the firewall rules
Go to Firewall > Rules:
Add a firewall rule on the LAN interface with the following settings:
- Protocol: *
- Source: LAN net
- Destination: network – 192.168.1.0/24 (the local network of the site A)
- Destination port: any

Then, add a firewall rule on the OpenVPN interface with the following settings:
- Protocol: *
- Source: network – 192.168.1.0/24 (the local network of the site A)
- Destination: LAN net
- Destination port: any

Obviously, your firewall rules could be more restrictive or permissive.
It’s done! Your VPN should be up! Let’s check.
Verifying the VPN connectivity
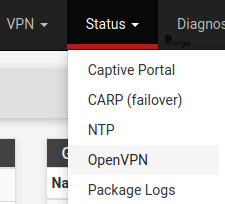
Firstly we check the openVPN status. Go to Status > OpenVPN:
If your VPN is up it will looks like this:

On this page, we can check the IP address of the remote host, the virtual IP and the traffic sent/received through the VPN.
If the VPN is not UP, try to restart the OpenVPN service and check the OpenVPN configuration on the client and server sides.
Secondly, we can try to send a PING request from a computer on the site A to a computer on the site B. And vice-versa.
If it doesn’t work you should verify your firewall rules.
That’s it, that’s all!
Related topics
[pfSense] Secure remote access for your home-office workers with OpenVPN
[pfSense] Configuring a Site-to-Site IPsec VPN
[pfSense] Site-to-site IPsec VPN with overlapping subnets
Take a look at our SSD firewalls
For pfSense or OPNsense
Assembled in France
3 year warranty


Hi,
you need a /28, no /30 Tunnel network. /30 will not work because it is to small!
Hi,
/30 tunnel network is sufficient. With a /30 subnet you have at least 2 usable IPs (one for each side).
If you need to connect more sites you can choose another mask, like /29, /28 and so on.
Guillaume
—
Provya
This was a really helpful guide. Thanks a lot.
What would I also need to configure, to route all internet traffic through the tunnel? I want all (or preferable a range of local IP sources, like 192.168.2.10-192.168.2.49) on the remote branch to go through the main offices firewall when accessing internet (and get public IP from main office)
Hi,
Please take a look at Routing Internet Traffic Through A Site-To-Site OpenVPN Tunnel
Guillaume
—
Provya