In this article, we set up limiters in order to equitably distribute the bandwidth of our Internet connection among all the users of our local network.
What are Limiters?
Generally speaking, limiters allow to define a maximum bandwidth for a purpose.
A limiter can be used to limit traffic to a specific IP address or subnet, to limit traffic for a specific type of service (e.g. e-mail, web, …) or to distribute traffic equitably among several users.
Typical uses of limiters are as follows:
- limit the Internet bandwidth of user X to 1 Mbps ;
- distribute equitably 10 Mbps of bandwidth between all the users of the “LAN” network;
- limit the bandwidth of the “OPT” network to a total of 5 Mbps;
- limit the bandwidth of the FTP protocol to 2 Mbps.
Limiters allow to define a maximum bandwidth for a usage.
At the opposite, traffic shaping (like CBQ) allows to guarantee a minimum bandwidth.
How limiters work?
The implementation of the limiters is done in 2 steps:
- creating limiter itself: it’s a pipe with a maximum bandwidth which operates globally or by group of IP addresses;
- creating assignment rules: which traffic will be limited by which pipe.
Limiters are usually created in pairs: one limiter for incoming traffic (Download) and one limiter for outgoing traffic (Upload).
Limiters are organized hierarchically: a root limiter (also called a pipe), with a bandwidth and a latency, and on the other hand child limiters (called queues) with a weight (i.e. a priority).
Use case: distribute Internet bandwidth equitably
In this article we work with the following case study: we have an Internet connection with a download speed of 200 Mbps and an upload speed of 50 Mbps.
We want to share dynamically this bandwidth between all users.
If we have 2 users connected at the same time, they will each have 100 Mbps for download and 25 Mbps for upload at the maximum.
If we have 10 users connected at the same time, they will each have 20 Mbps for download and 5 Mbps for upload at the maximum.
pfSense will manage this equitable distribution automatically and dynamically as we go.
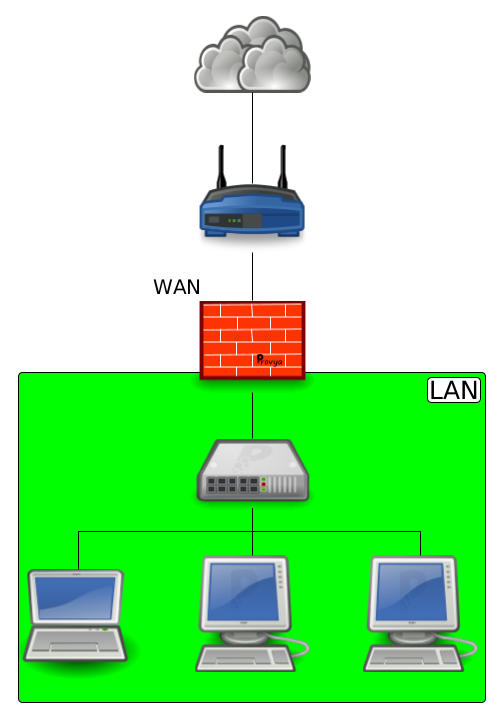
The network diagram is as follows:
Let’s start the configuration!
1. Creating the upload limiter
We create 2 root limiters: one for upload and one for download.
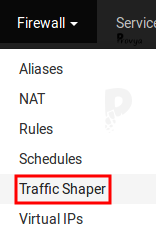
Navigate to Firewall > Traffic Shaper:
On the Limiters tab, click on the “+ New Limiter” button.
The items to be configured are the following:
- Enable: check this box to enable the pipe and its queues.
- Name: the name of the pipe (alphanumeric characters and underscore only). In our case, we call it “Upload“.
- Bandwidth: the bandwidth of the pipe. Note that we can define a bandwidth according to a schedule (“Schedule” option). In our case, we choose “50 Mbps”.
- Mask: this parameter allows to define how the limitation will be applied to the traffic. 3 choices are available:
- none: the limitation will apply to all traffic as a single set. In our case, this is what we choose (we want the whole outgoing traffic to be limited to 50 Mbps).
- Source addresses: the limitation will apply per source IP address (or group of source IP addresses, depending on the mask). So, to perform a limitation by IP address of a network, we choose “Source addresses” and specify a /32 mask. This is the value we will choose when we will configure the queue of our Upload pipe.
- Destination addresses: the limitation will apply by destination IP address (or group of destination IP addresses, depending on the mask). This is the value we will choose when we will configure the queue of our Download pipe.
- Description: description field, purely informative.
- Advanced Options: allows to set advanced parameters such as latency or packet loss rate. These parameters are useful to simulate bad Internet connections (or to make a bad joke to a colleague…). We won’t use it in our case, but the name of each field speaks for itself.
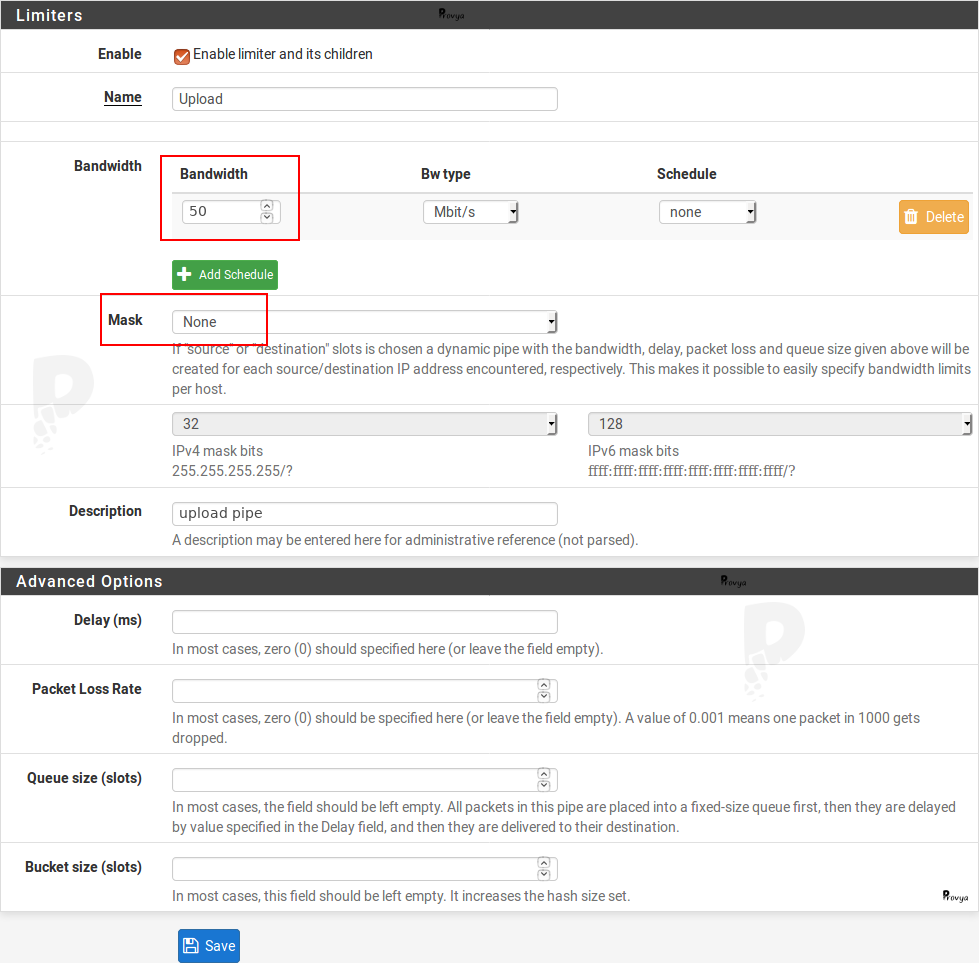
At this point we have a pipe that will allow us to limit our traffic to a maximum bandwidth of 50 Mbps.
The next step is to create a queue linked to this pipe and specify that this queue will be applicable per user.
At the bottom of the page of the limiter we just created, we click on the “+ Add new Queue” button.
The items to be configured are the following:
- Enable: check this box to enable the queue.
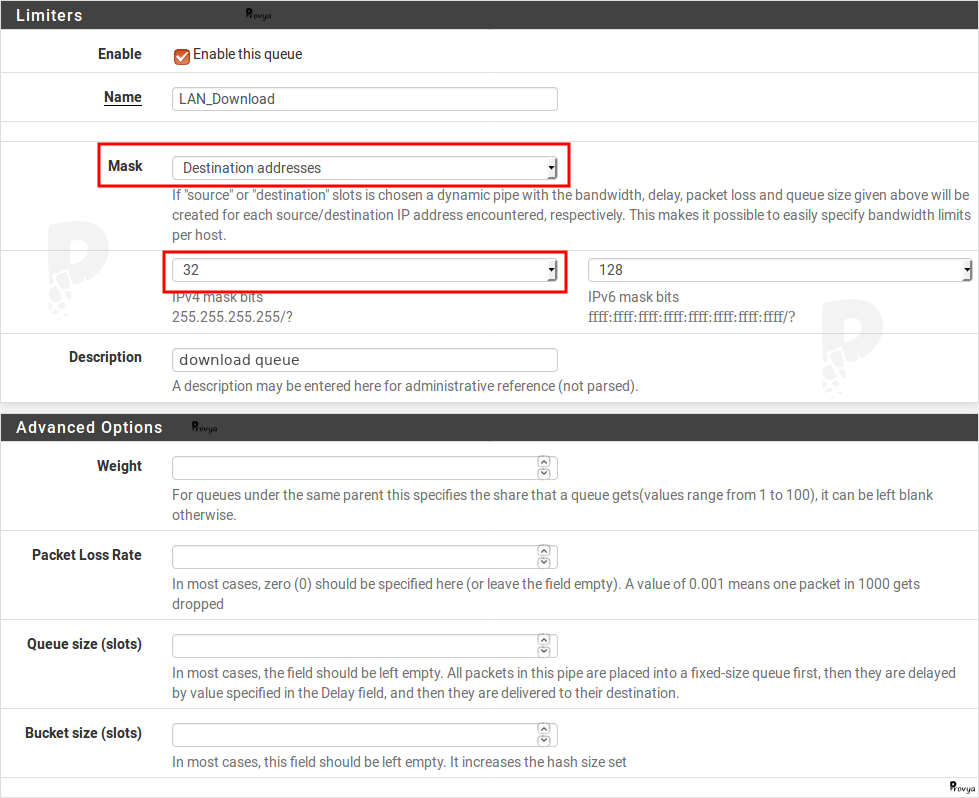
- Name: the name of the queue. In our case, we call it “LAN_Upload“.
- Mask: the mask to be applied. In our case, we choose “Source addresses”. We want to apply this limitation for each user, i.e. per source IP address, so we choose “32” as mask size.
- Description: description field, purely informative.
- Weight: weight ranging from 1 (lowest priority) to 100 (highest priority). For a fair distribution of the bandwidth of the root limiter, this field can be left empty. If we want to give more bandwidth to some users than to others, then we have to play with this value. In our case, we leave the field empty (the distribution will be fair between users).
- Advanced Options: we leave these fields empty.
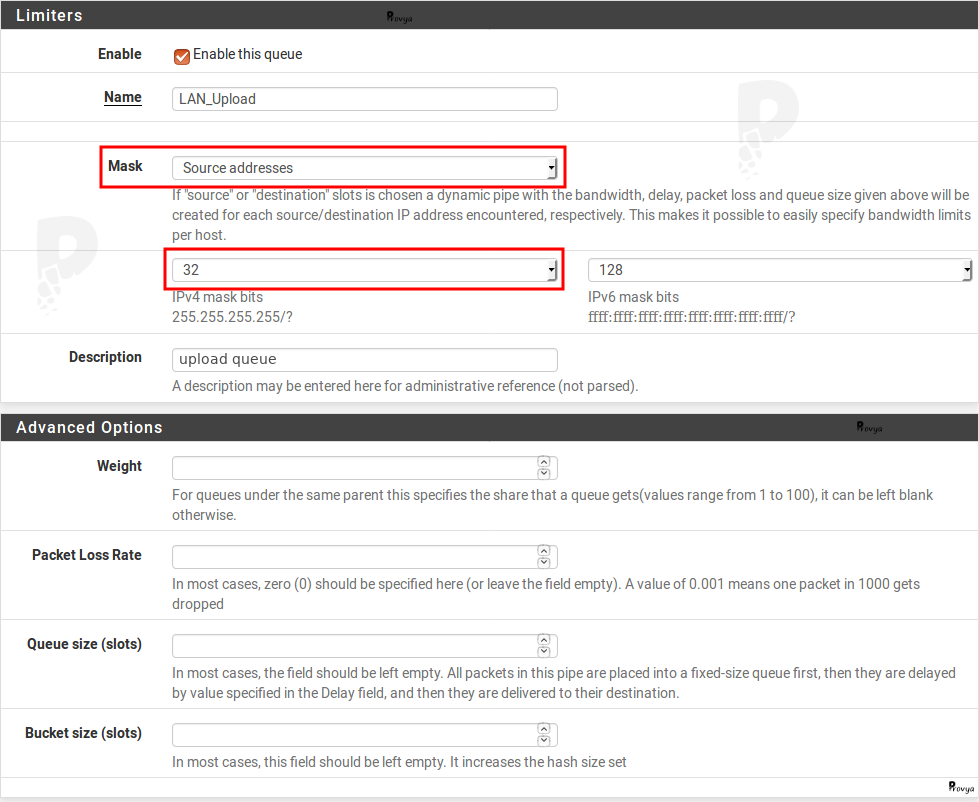
Our limiters (pipe and queue) are ready for outgoing (upload) traffic.
We still have to do the same configuration for incoming (download) traffic.
2. Creating the download limiter
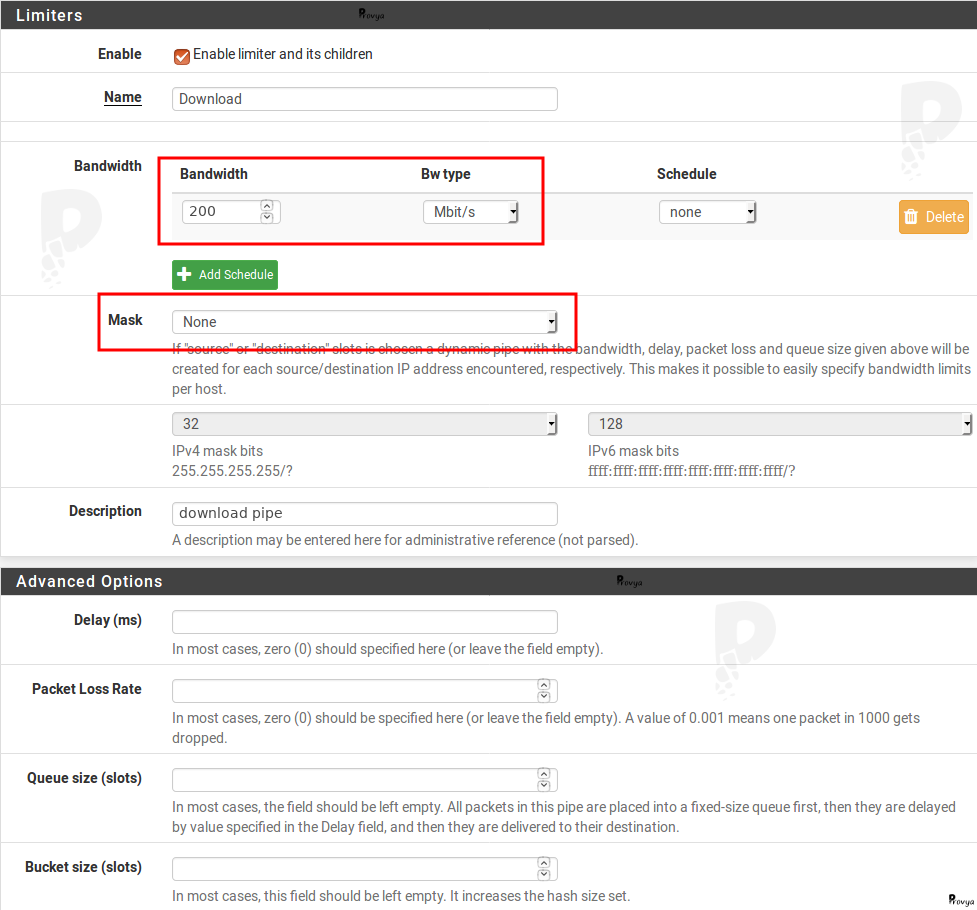
We click on the “+ New Limiter” button.
The pipe configuration is the same as for the upload pipe.
You just have to think about choosing the right bandwidth (in our case, 200 Mbps) and changing its name (in our case, we call it “Download”).
As for the upload pipe, we create a queue: click on the button “+ Add new Queue”.
The configuration is almost the same as for the upload queue.
The difference is in the choice for the “Mask” option. Choose “Destination addresses”.
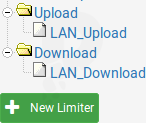
The limiters are created:
3. Modifying firewall rules
The last step is to configure the firewall to associate traffic with limiters.
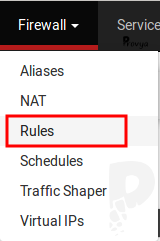
Navigate to Firewall > Rules:
Choose the LAN tab and edit each filtering rule for Internet access.
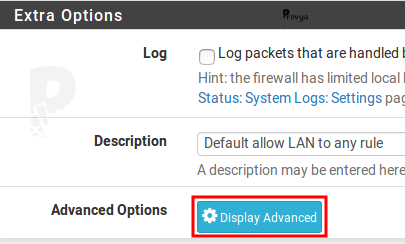
On each rule, go to the advanced options (“Display Advanced” button):
At the bottom of the page, for the “In / Out pipe” option, choose “LAN_Upload” for the first drop-down list and “LAN_Download” for the second:

It is necessary to perform this manipulation on all the rules concerned.
The traffic limitation per user is in place!
4. Verifying the service
To check that the limiters are working properly, navigate to Diagnostics > Limiter Info.
Each pipe and its queues is presented in text format with its parameters and values.
Related topics
[pfSense] Configuring traffic shaping with CBQ
[pfSense] How network interfaces work
[pfSense] Upgrading pfSense (how-to)
Take a look at our firewalls
For pfSense or OPNsense
3 year warranty
Free delivery