It is important to keep an up-to-date version of pfSense on our production firewalls.
In this article, we will see how to upgrade a pfSense server or a cluster of pfSense servers.
Summary
How to upgrade a standalone instance of pfSense?
How to upgrade a cluster instance of pfSense?
Can I upgrade from a very old version of pfSense to the lastest one?
How to upgrade packages?
The update did not work, what can I do?
How to upgrade a standalone instance of pfSense?
The upgrade process will be done in 3 steps:
- Making a backup of the configuration: it will allow a quick rollback if necessary.
- Updating the pfSense server: an Internet connection is required.
- Making a backup of the configuration: it will allow us to have an up-to-date backup of the configuration.
Let’s go!
1. Making a backup
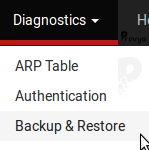
Navigate to Diagnostics > Backup & Restore:
In the drop-down list “Backup Area” choose “All”. Leave the box “Do not backup RRD data” checked, and unchecked the two other boxes.
Then click on “Download Configuration as XML“:

2. Updating the pfSense server
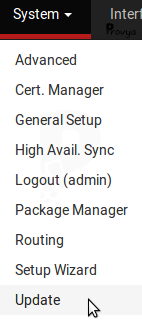
Navigate to System > Update:
Click on “Upgrade now” to perform the upgrade.
The update takes a few minutes to download and apply, depending on the speed of the Internet connection and the size of the update.
The firewall will reboot automatically when finished.
That’s it. The pfSense server is up-to-date.
If you encounter errors, take a look at the section “The update did not work, what can I do?“.
3. Making a final backup
Make a new backup following the procedure described above.
Well done. The update of the pfSense server is done!
How to upgrade a cluster instance of pfSense?
The upgrade process will be done in 5 steps:
- Making a backup of the secondary pfSense server.
- Updating the secondary pfSense server.
- Making a new backup of the secondary pfSense server.
- Disabling CARP on the primary pfSense server: the secondary server becomes the new master.
- Repeat the process on the primary pfSense server: making a backup, updating, making a backup again. Then reactivate CARP.
Let’s start with the secondary pfSense server.
1. Making a backup of the secondary pfSense server
Navigate to Diagnostics > Backup & Restore:
In the drop-down list “Backup Area” choose “All”. Leave the box “Do not backup RRD data” checked, and unchecked the two other boxes.
Then click on “Download Configuration as XML“:
2. Updating the secondary pfSense server
Navigate to System > Update:
Click on “Upgrade now” to perform the upgrade.
The update takes a few minutes to download and apply, depending on the speed of the Internet connection and the size of the update.
The firewall will reboot automatically when finished.
That’s it. The secondary pfSense server is up-to-date.
If you encounter errors, take a look at the section “The update did not work, what can I do?“.
3. Making a new backup of the secondary pfSense server
Make a new backup following the procedure described above.
The update of the secondary pfSense server is done!
Continue the upgrade on the primary pfSense server.
4. Disabling CARP on the primary pfSense server
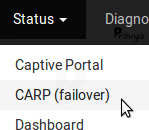
Navigate to Status > CARP (failover):
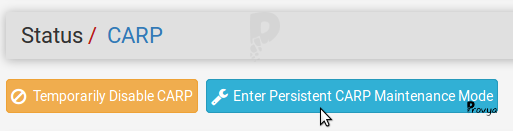
Click on “Enter Persistent CARP Maintenance Mode“:
At this step, we can run some tests to make sure everything is working properly.
5. Repeat the process on the primary pfSense server
We can now quietly update the primary server. The procedure is the same as described in the previous steps.
Once the update on the primary server is done, the VIP address will not switch back on the primary pfSense server by itself.
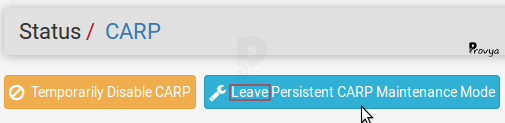
CARP must be reactivated.
Navigate to Status > CARP (failover) and click on “Leave Persistent CARP Maintenance Mode“:
Well done. The update of the pfSense cluster is done!
We can run new tests to make sure everything is working properly.
Can I upgrade from a very old version of pfSense to the lastest one?
In theory, the answer should be yes, you can.
But in practice, it is a very bad idea.
The best thing to do is to make a backup, install the latest version of pfSense on the server, install the packages, and then upload the backup to the server.
It’s not a long process. A fresh install of pfSense can be done in less than 15 minutes.
How to upgrade packages?
Packages can sometimes be a source of problems during an update.
If a package does not seem to work properly after an upgrade, it is recommended to uninstall the package and then reinstall it.
The update did not work, what can I do?
The best thing to do is to install from scratch the latest version of pfSense on the server, install the packages, and then upload the backup to the server.
It’s not a long process. A fresh install of pfSense can be done in less than 15 minutes.
If it still does not work, we can try to downloading and installing an older version of pfSense. To find an old version of pfSense, google is our friend. We can also take a look at the Dakota State University repository: https://repo.ialab.dsu.edu/pfsense/
Finally if you want more information about upgrading, take a look at these links:
- https://docs.netgate.com/pfsense/en/latest/install/upgrade-guide.html
- https://docs.netgate.com/pfsense/en/latest/troubleshooting/upgrades.html
Related topics
[pfSense] Making automatic backups with AutoConfigBackup
[pfSense] Configuring High Availability
Take a look at our firewalls
For pfSense or OPNsense
3 year warranty
Free delivery to USA, Canada, EU and UK