In this article we present a solution to block public IP addresses that are known to be at risk or hosting malware or malicious content.
It is an easy and interesting solution to improve the security of your network.
This is a paid service.
Blocking bad IP addresses. Why?
A good practice in computer security is to block traffic to or from sources known to be at risk.
That is, traffic to or from servers or IP addresses that host viruses, malware, malicious content or are in the hands of hackers.
This provides a layer of security for outbound Internet traffic: in case of DNS hijacking or infection by worms or malware, traffic is usually sent or redirected to fraudulent servers. Trying to detect these servers and blocking traffic to them is a good approach.
In the same way, when a company hosts a service such as an OpenVPN access or a web server, there is usually no filtering applied on the public IP addresses that can connect. Blocking the IP addresses known to be used by malicious people is therefore also an interesting approach.
In order to be effective, these lists of bad IP addresses must be updated very regularly to keep up with current threats.
They must avoid false positives, i.e. not listing IP addresses that are in fact perfectly legitimate.
If the false-positive rate is too high, then it becomes completely unusable in production.
Filtering bad public IP addresses is part of a defence in depth security approach.
The lists we present in this article are built by us. They are paid lists which allow a very fine and very effective filtering.
The implementation will be done in two steps: create an alias to retrieve the lists of bad IP addresses, then create the filtering rules blocking the traffic associated with these aliases.
1/2. Create an alias containing the list of bad IP addresses
We provide three lists:
- strict: this list contains the IP addresses that we have detected in at least two different collection sources. The probability of encountering a false positive is low.
- main: this list contains the IP addresses that we have detected in at least three different collection sources. The probability of encountering a false positive is extremely low. This is the list we recommend to use.
- soft: this list contains IP addresses that we have detected in at least four different collection sources. The probability of encountering a false positive is theoretically zero.
Access to these lists is subject to an annual subscription fee.
If you are interested, you can consult our online store: Bad and malicious IP filtering list.
To discover the service, we propose an introductory offer at $10 for one month.
Let’s go to the implementation.
On pfSense
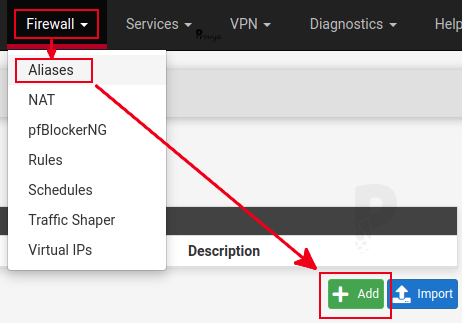
We create an alias by going to the Firewall > Aliases menu and click on the “+ Add” button:
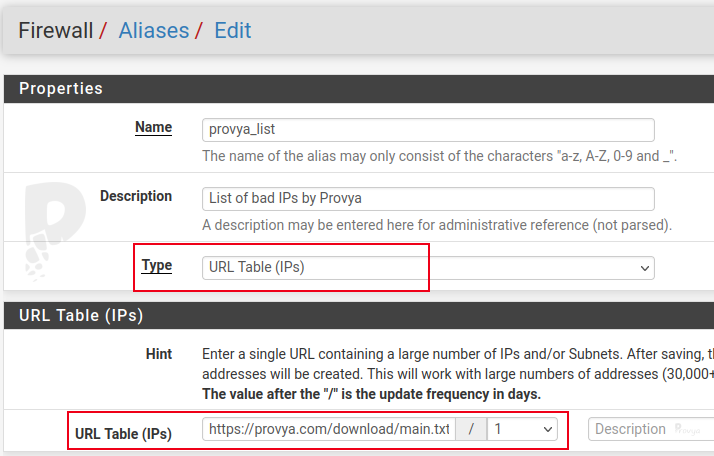
The fields to fill in are the following:
- Name: the name we want to give to our alias
- Type: choose “URL Table (IPs)”
- URL Table (IPs): enter the url of the list we want to download (see next paragraph). The number after the slash indicates the update frequency in number of days. We set “1”.
To download the list of your choice, you must have a valid license key.
The URL to enter will be of the following form: https://provya.com/download/VERSION.txt?key=YOUR_KEY (replacing VERSION by the chosen file and YOUR_KEY by the license key you will have received by e-mail).
This gives one of the following URLs to use:
- strict list: https://provya.com/download/strict.txt?key=YOUR_KEY
- main list (recommended): https://provya.com/download/main.txt?key=YOUR_KEY
- soft list: https://provya.com/download/soft.txt?key=YOUR_KEY
Example of result obtained:
By default, pfSense only offers an update of the “URL Table” aliases once a day at best. This frequency is too low to have a really up-to-date list. We recommend updating the list every two hours.
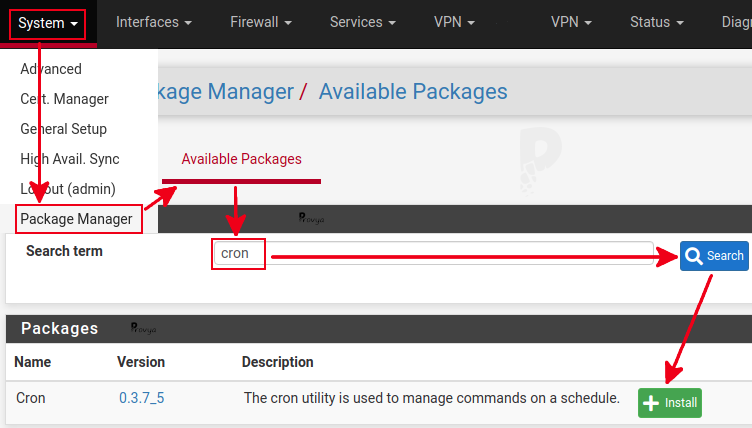
We suggest to install the “cron” package in order to perform more frequent updates.
We go to the System > Package Manager menu, “Available Packages” tab. We do a search with the keyword “cron” and click on the install icon :
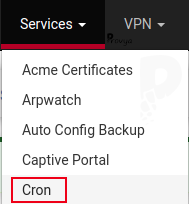
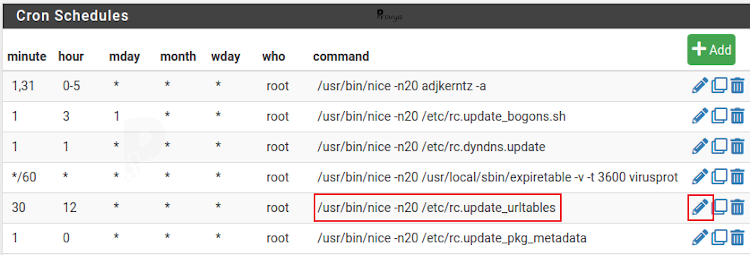
Once the “cron” package is installed, go to the Services > Cron menu:
We locate the line rc.update_urltables and click on its edit icon (pencil):
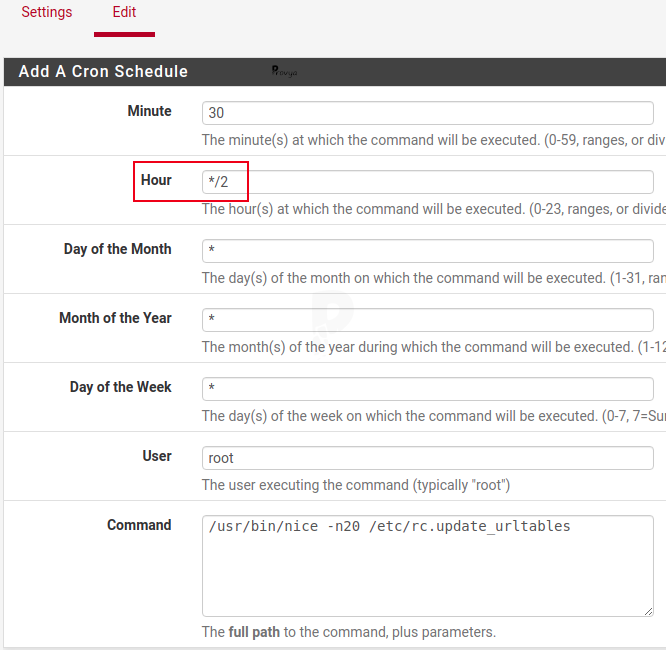
Change the “Hour” field like this:
On OPNsense
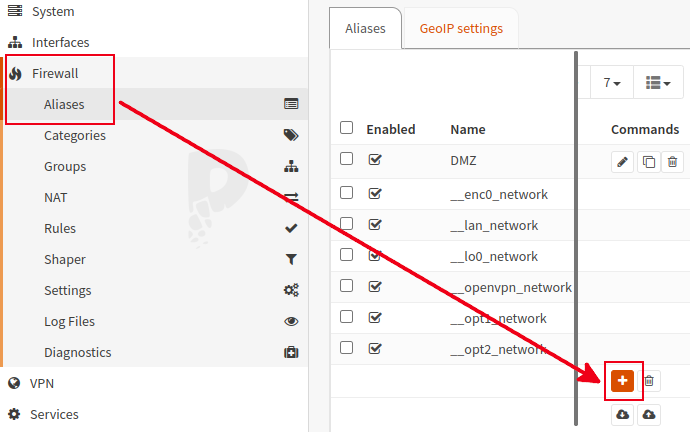
Go to the Firewall > Aliases menu and click on the “+” button:
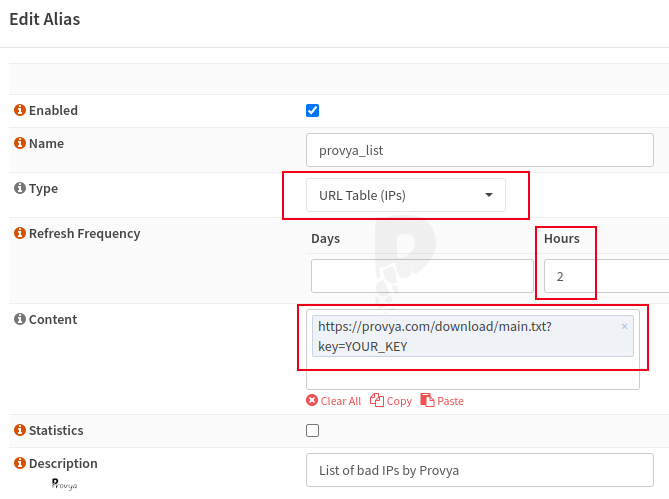
The fields to fill in are the following:
- Name: the name we want to give to our alias.
- Type: URL Table (IPs)
- Refresh Frequency: the refresh frequency. We recommend to refresh once every two hours.
- Content: enter the url of the list we want to download (see next paragraph).
To download the list of your choice, you must have a valid license key.
The URL to enter will be of the following form: https://provya.com/download/VERSION.txt?key=YOUR_KEY (replacing VERSION by the chosen file and YOUR_KEY by the license key you will have received by e-mail).
This gives one of the following URLs to use:
- strict list: https://provya.com/download/strict.txt?key=YOUR_KEY
- main list (recommended): https://provya.com/download/main.txt?key=YOUR_KEY
- soft list: https://provya.com/download/soft.txt?key=YOUR_KEY
Example of result obtained:
Advantage of OPNsense over pfSense: it is possible to set a refresh rate in days as well as in hours (against only in days for pfSense). All the step related to the cron management described for pfSense is not necessary on OPNsense!
The configuration of our alias is finished. We now need to configure our filtering rules to block incoming traffic from these IP addresses, as well as outgoing traffic to these IP addresses.
2.2/ Create the filter rules
On pfSense
Go to Firewall > Rules menu and add a rule on the WAN interface (or generally on the interfaces of your Internet connections) at the top of the list by clicking on ![]() .
.
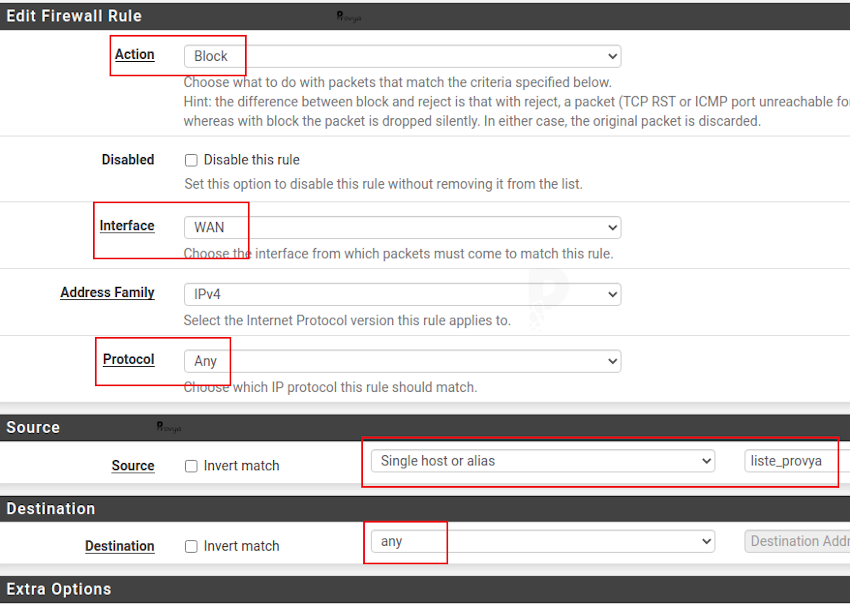
The fields to fill in are the following:
- Action: Block
- Protocol: Any
- Source: “Single host or alias” and enter the name of the alias created in the previous step
- Destination: any

Finally, we also create a rule on the LAN interface (or more generally on all our local interfaces that have access to the Internet) that we place at the top of the list by clicking on ![]() .
.
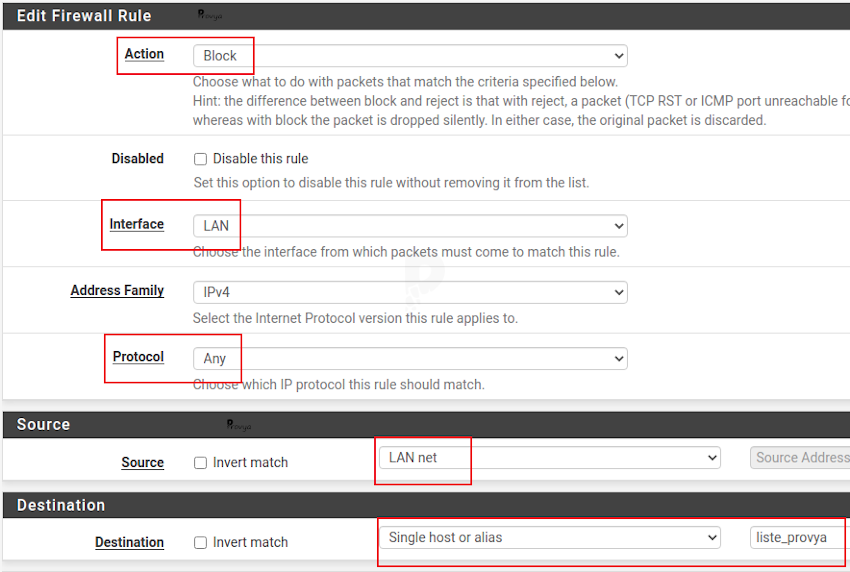
The fields to fill in are the following:
- Action: Block
- Protocol: Any
- Source: LAN net
- Destination: “Single host or alias” and enter the name of the alias created in the previous step

On OPNsense
Go to Firewall > Rules menu and add a rule on the WAN interface (or generally on the interfaces of your Internet connections) at the top of the list by clicking on ![]() .
.
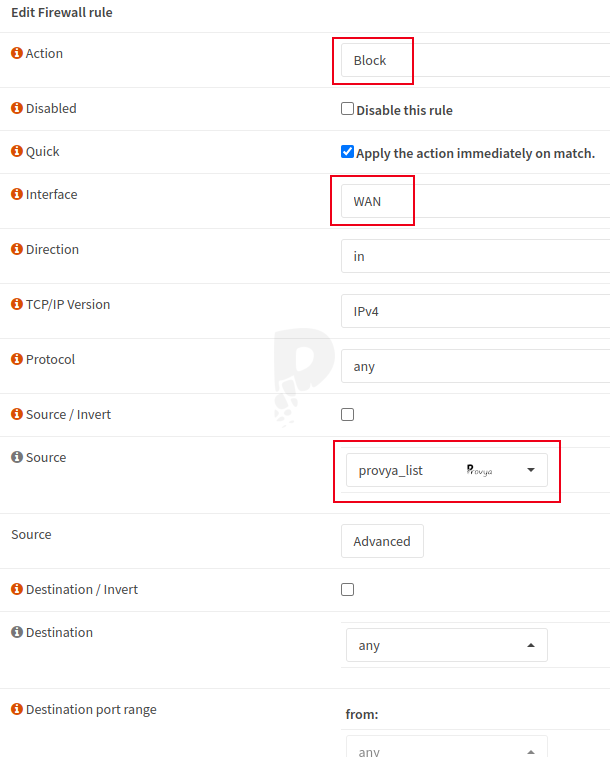
The fields to fill in are the following:
- Action: Block
- Protocol: Any
- Source: “Single host or alias” and enter the name of the alias created in the previous step
- Destination: any

Finally, we also create a rule on the LAN interface (or more generally on all our local interfaces that have access to the Internet) that we place at the top of the list by clicking on ![]() .
.
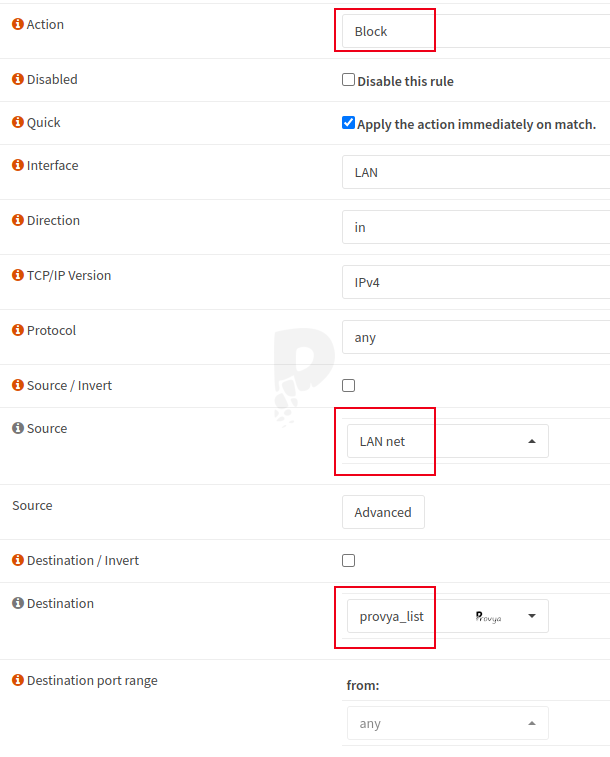
The fields to fill in are the following:
- Action: Block
- Protocol: Any
- Source: LAN net
- Destination: “Single host or alias” and enter the name of the alias created in the previous step

That’s it!
This is an essential and really simple to implement security feature to provide an extra level of security for traffic passing through our firewall.
Related topics
Take a look at our firewalls
For pfSense or OPNsense
3 year warranty
Free delivery to USA, Canada, EU and UK